Shop talk: Traditional animation and Cintiq tablets

An article in animator Steve Moore’s online animation magazine FLIP! has a survey of animator’s who are using Cintiq tablets for their professional and personal animation work.
With so many “traditional” animators now animating paperlessly using Cintiqs and/or Intous tablets I thought that this round up of professional opinions of how the workflow is changing (for better or worse) using tablet-based paperless animation is of interest to our students (many of whom are also working paperlessly or in a hybrid process using both traditional pencil-on-paper , combined with drawing on a tablet)
Check out the discussion among the pros on FLIP :
It’s always interesting to listen to animators discussing their favorite tools (it used to be that animators would get in to long, often passionate discussions about what was the “best” pencil .)
I think my friend Rusty Mills had some of the best comments about what it means to be a traditional animator working on a Cintiq . Rusty emphasizes that it’s not the Cintiq (or other tablets) that make something difficult to draw or to achieve a good line quality: it’s about the artist’s own mastery of traditional drawing skill sets, as well as the software being used . Rusty debunks several myths about using a Cintiq, such as:
“The Cintiq has terrible line quality.”
Often the user doesn’t know enough about a software package to alter the look of the line. I have even seen particular studios mandate ‘bad line quality’ because the people in charge don’t know how to use the software correctly.
If you find using a Cintiq alters your drawing style for the worse try changing some of the setting both in your software and in the tablet driver itself.
Following up on some of what Rusty talks about in that article on the “FLIP!” site here are things that I have found help to make animating with a tablet a much more enjoyable experience:
1.) Adjust the Digital Drawing Tools to your own preferences:
Also, an important point often missed by beginners to tablet based drawing is that the individual animator needs to make adjustments to the pre-set brushes and pencil tools that come with the software , be it TVPaint , Toonboom, or Flash, etc. The digital drawing tools in these programs can and should be tweaked to fit your own preferences , exactly as some animators prefer a certain type of pencil over another. (Blackwing 602 or Blaisdell Layout Pencil? Tombow or Col-Erase Tuscan Red ? ) Don’t simply use the default settings on the drawing tools as they come with the software off the shelf . Play. Experiment . Try adjusting the tools until you get a “pencil” or a “pen” line that feels comfortable to draw with.
In addition to adjusting the drawing tools to fit your own preferences also be aware that some of the better animation programs such as TVPaint Animation (highly recommended) have custom “papers” which can be turned on in the background. The paper will give a more textured, toothy feel to the drawing , simulating the feel of drawing on a slightly rough surfaced paper.
2.) Project Resolution Size:
Another thing that many people overlook is that screen resolution of the project does matter : if your original file is low-res. like 640 x 480 you will not have nearly the same amount of control and subtly of line as working at full 2K Film Resolution 2048 x 1556 . Many people like to work at HD “wide-screen” resolution 1920 x 1080. Trying to get subtle clean-up line quality at 640 x 480 is like drawing on the back of a napkin or on a Post-It note compared to working on a large canvas or a large piece of high-grade bond paper. Sometimes I will work at lower resolutions if I’m just blocking in rough sketches that I know are not going to be any larger, the same as I will sometimes do a rough storyboard using Post-It notes , but if the line quality counts then I use a larger resolution .)
Then when you export your finished animation for uploading to a website you can reduce the size (say 2048 x 1556 output to 640 x 480 ) so the file sizes aren’t unmanageable , but the original resolution should be as high as your computer can reasonably handle (this can become an issue if you don’t have enough memory or your CPU is not fast enough ; as always a faster computer with more memory will run better. If your animation software runs sluggishly at high resolutions then it’s time to upgrade ) .
3.) Wacom Pen Nibs:
Finally, be aware of the different types of stylus nibs that Wacom makes . The standard hard plastic nib that comes with the pen stylus can tend to be a bit slippery and hard to control as it skates across the surface of the tablet. Some people solve this by putting a thin piece of tracing paper vellum or a frosted (matte surface) piece of acetate over the tablet’s surface to give the surface of the the tablet a bit of “grain” so the pen tip isn’t quite so slippery. But another option that I prefer (especially for sketching rough animation drawings) is to use the Wacom “Felt Tip” nibs. These fiberous nibs feel more like drawing with a real pencil and are not as slippery as the standard plastic nib. For digital clean-up or “inking” I will sometimes use the Wacom “Stroke Nibs” which are like the standard plastic tip nibs, but they have a little spring in them which gives them a more flexible, springy feeling when laying down a line.
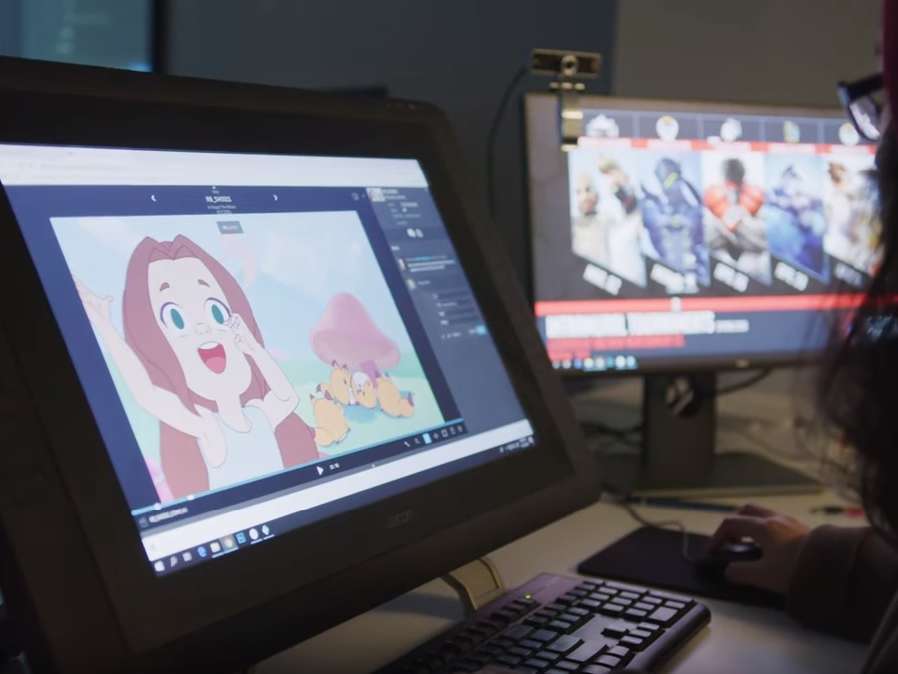
Here’s another example of a “traditional” looking drawing done with a Cintiq tablet using the TVPaint Animation software:

This is by Academy of Art Online instructor Mark Chong. Here’s a screen capture time lapse movie of Mark drawing this in TVP:
Here’s another video I found on YouTube showing the process of animating a traditional style animation scene (this time using Flash) in a paperless environment on the Cintiq tablet . The video compares working on paper in the first part of the video, then shows working on the Cintiq :
The important thing that students should realize it that it is not an “either/or” choice that must be made between either traditional pencil-on-paper or paperless animation … rather it’s a “both/and” choice the artist can take advantage of. Use the tools that are the most appropriate for the project. For some things pencil-on-paper is still best , but can be used in combination with digital tools like the Cintiq. Or sometimes going all paperless is the workflow that fits best for the project.
We’re in a very exciting time for traditional hand-drawn animation with so many options .
One nice additional piece of equipment to use with the Cintiq is an Ergotron LX arm to mount the Cintiq on , so it can swing down to a comfortable angle/height to draw on , but then when you are not using the Cintiq it can be swung up and to the side so it is out of the way .
http://www.amazon.com/LX-Desk-Mount-LCD-Arm/dp/B00358RIRC
http://fox-orian.deviantart.com/journal/Wacom-Cintiq-21UX-Erogtron-LX-Review-photos-222662142
Here is Pixar artist Scott Morse working on the Pixar short “Your Friend The Rat” , on his Cintiq tablet mounted on a Ergotron arm:

The Ergotron arm let’s the Cintiq be adjusted to the height/tilt that the individual artist prefers:

Of course it is also possible to retro-fit the Cintiq into a traditional animation desk as I have done on my animation desk shown here:

This photo is from several years ago when I was working on the 2D animated video game “The Act” for Cecropia Games (now Re-Act Entertainment) , but I still use this exact same set up in my work today as a teacher at AAU Online.
Here’s another photo of the retro-fitted traditional animation desks we were using at Cecropia Games :

–David Nethery, Associate Director of 2D Animation Online
.